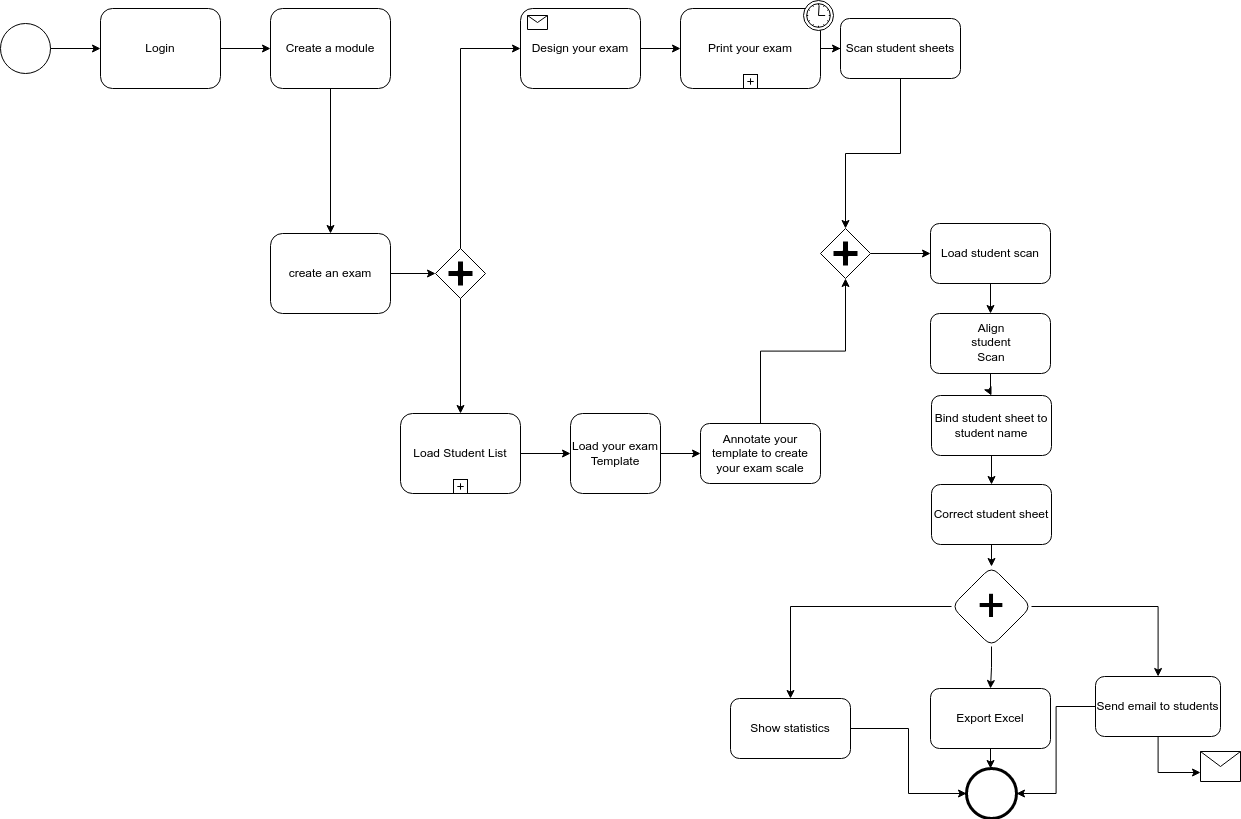
The main stages to achieve to evaluate an exam
The main stages of exam marking are as follows
Create an account on the platform ?
Create a course and an exam (this includes creating your exam using a word processor (word, google doc, libreoffice) or latex ;) and upload the list of students who can take the exam.
Create your marking scheme (how each question will be graded, typical comments per question, …)
Load scans of exam papers in the right order
Straighten your scans
Associate each copy with a student (assisted by AI)
Correct copies (question by question or student by student or any other combination)
Look at the statistics associated with passing the exam to potentially adjust the grading a little.
Send feedback to students
Export grades in excel format for transmission to school department
A demonstration video is available here in French.
Step 0: How do I create an account on the platform?
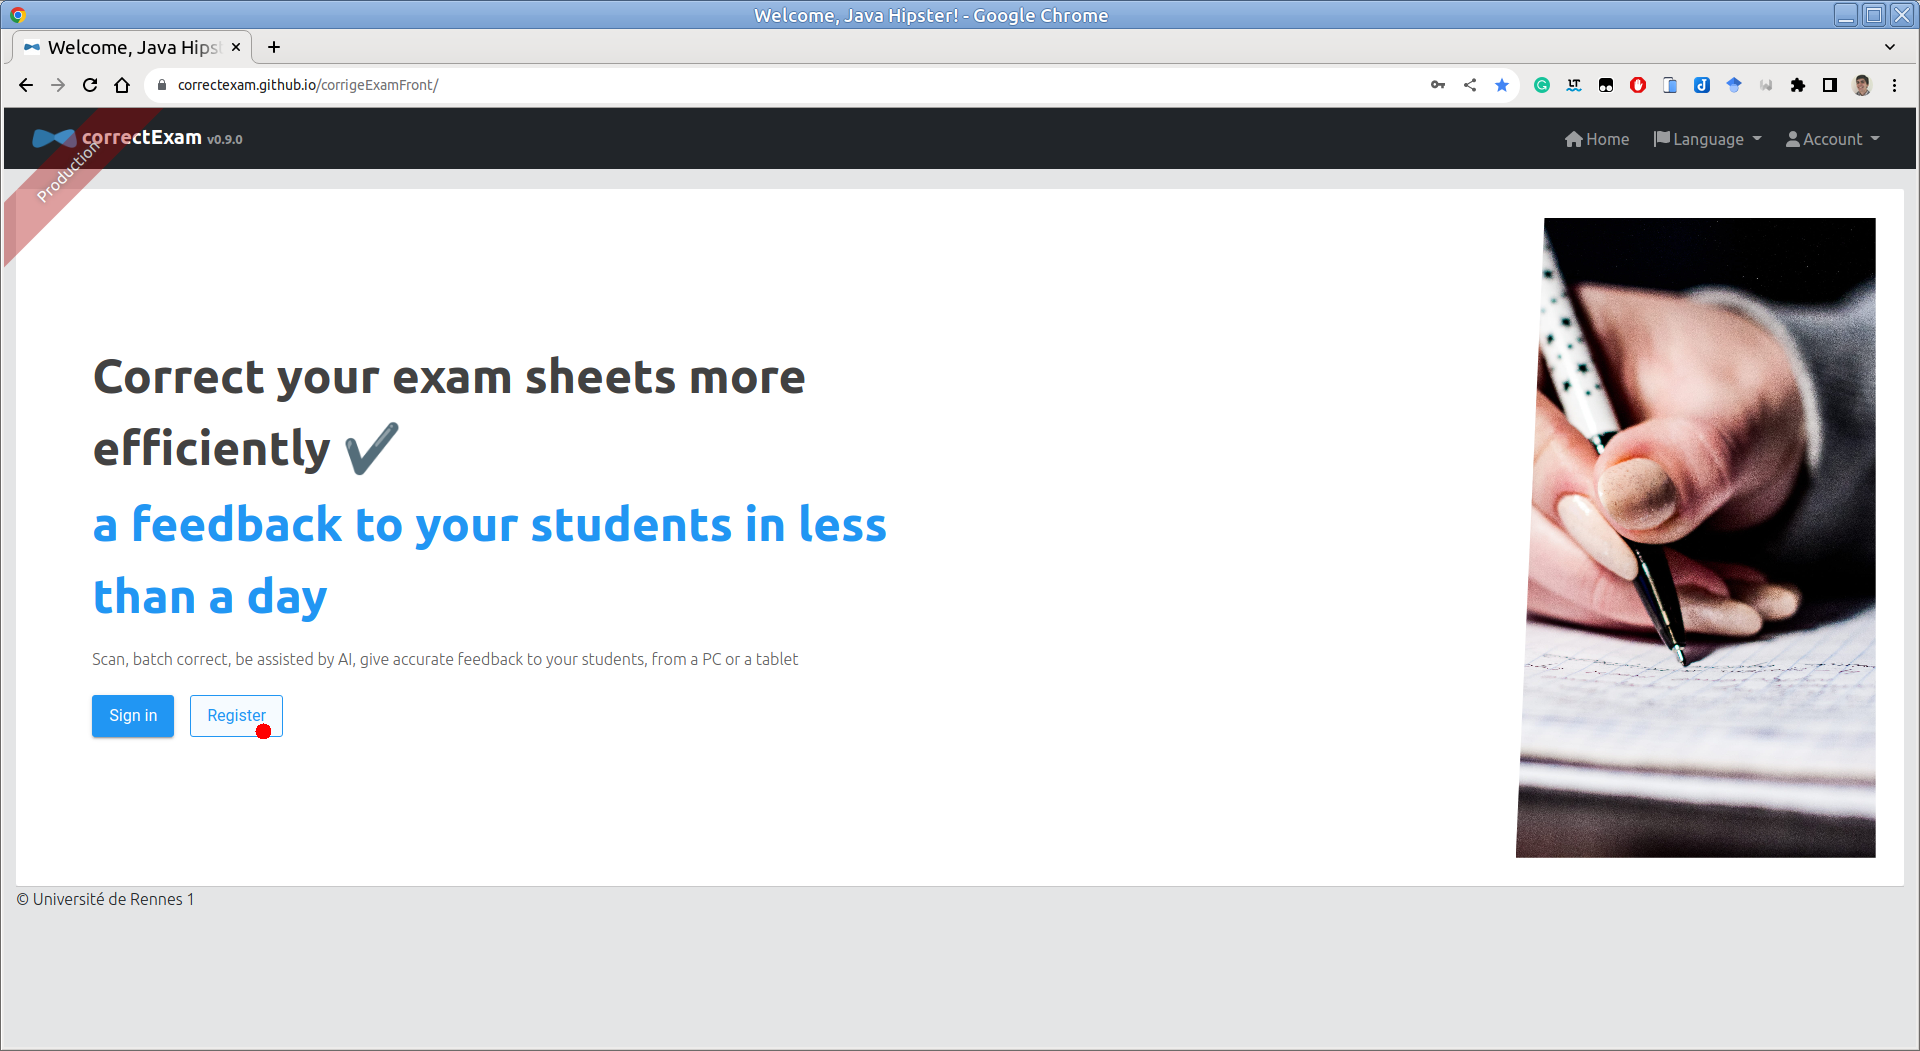
You can go to the platform, click on register, fill in a few details. You will receive an e-mail to validate your account.

You can then fill in your account information in the menu. Account -> Settings menu
Step 1: Create your course and exam (This includes creating your exam using a word processor (word, google doc, libreoffice) or latex ;)
Once logged in, on the home page, click on the + symbol create a course. You need to give the course a name.
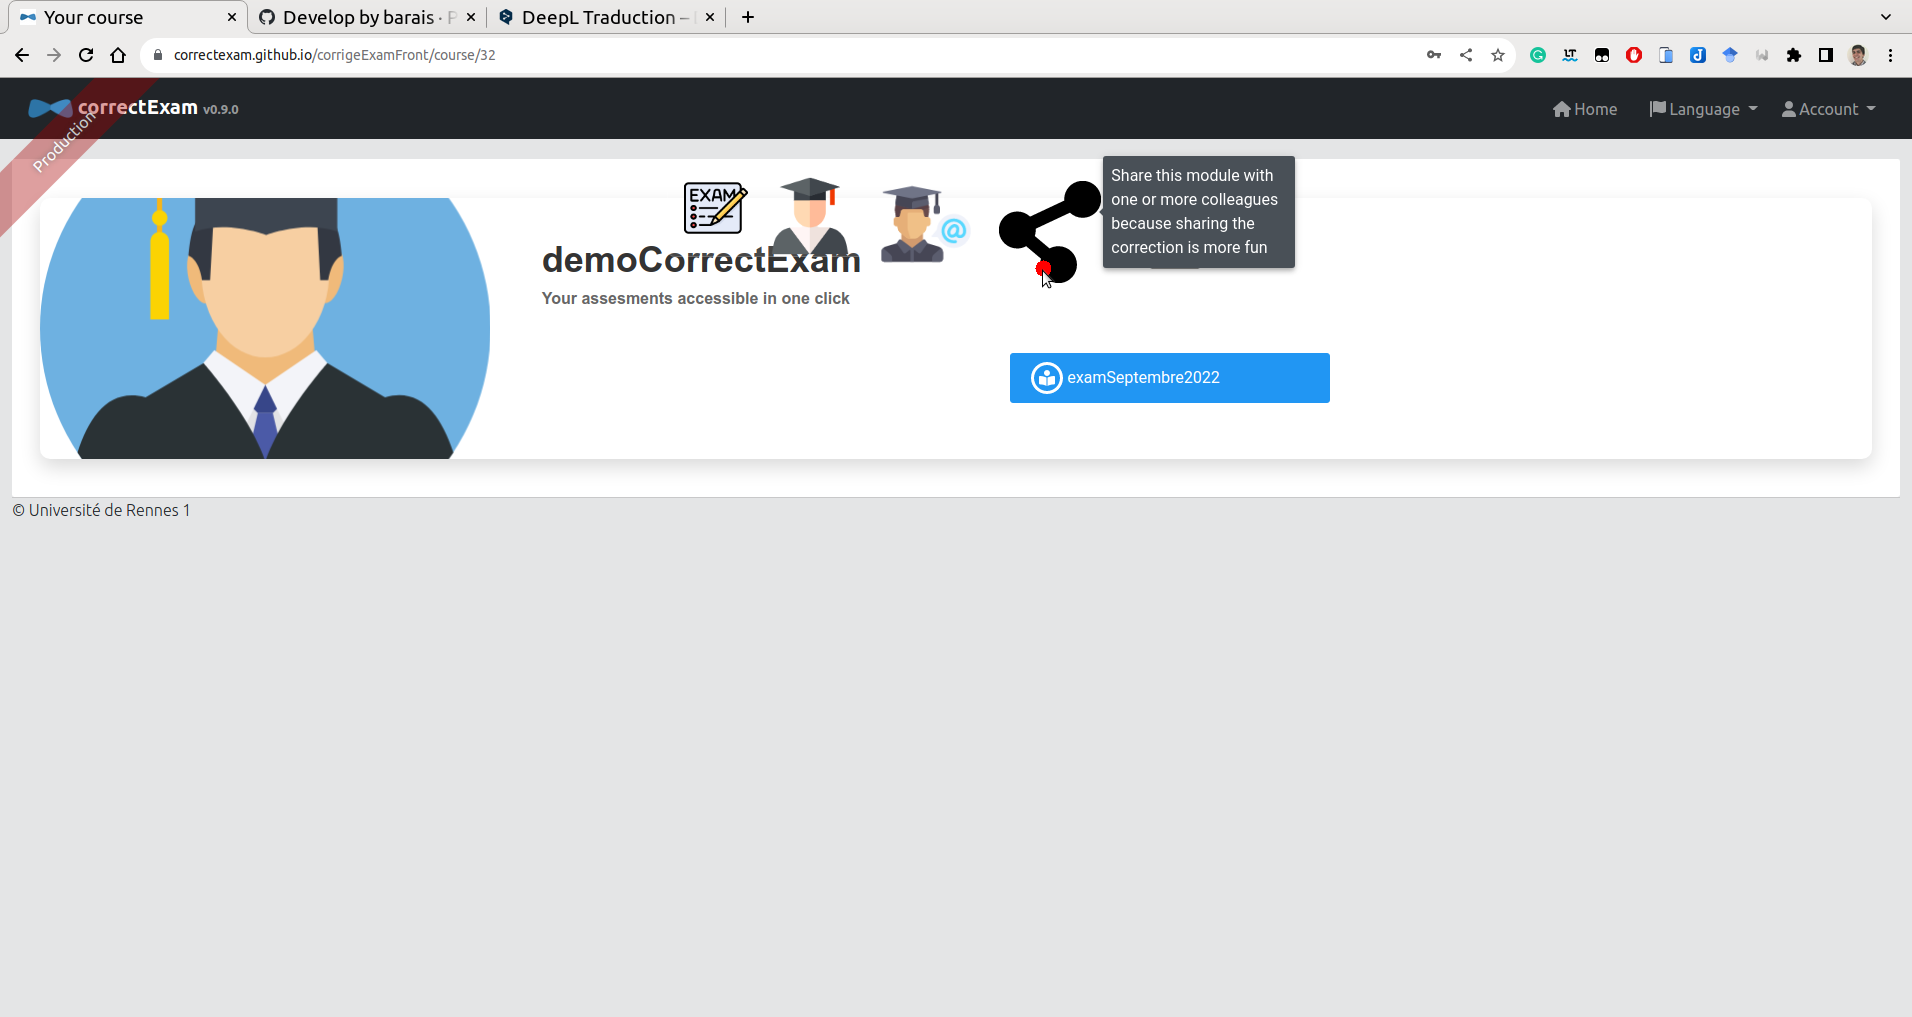
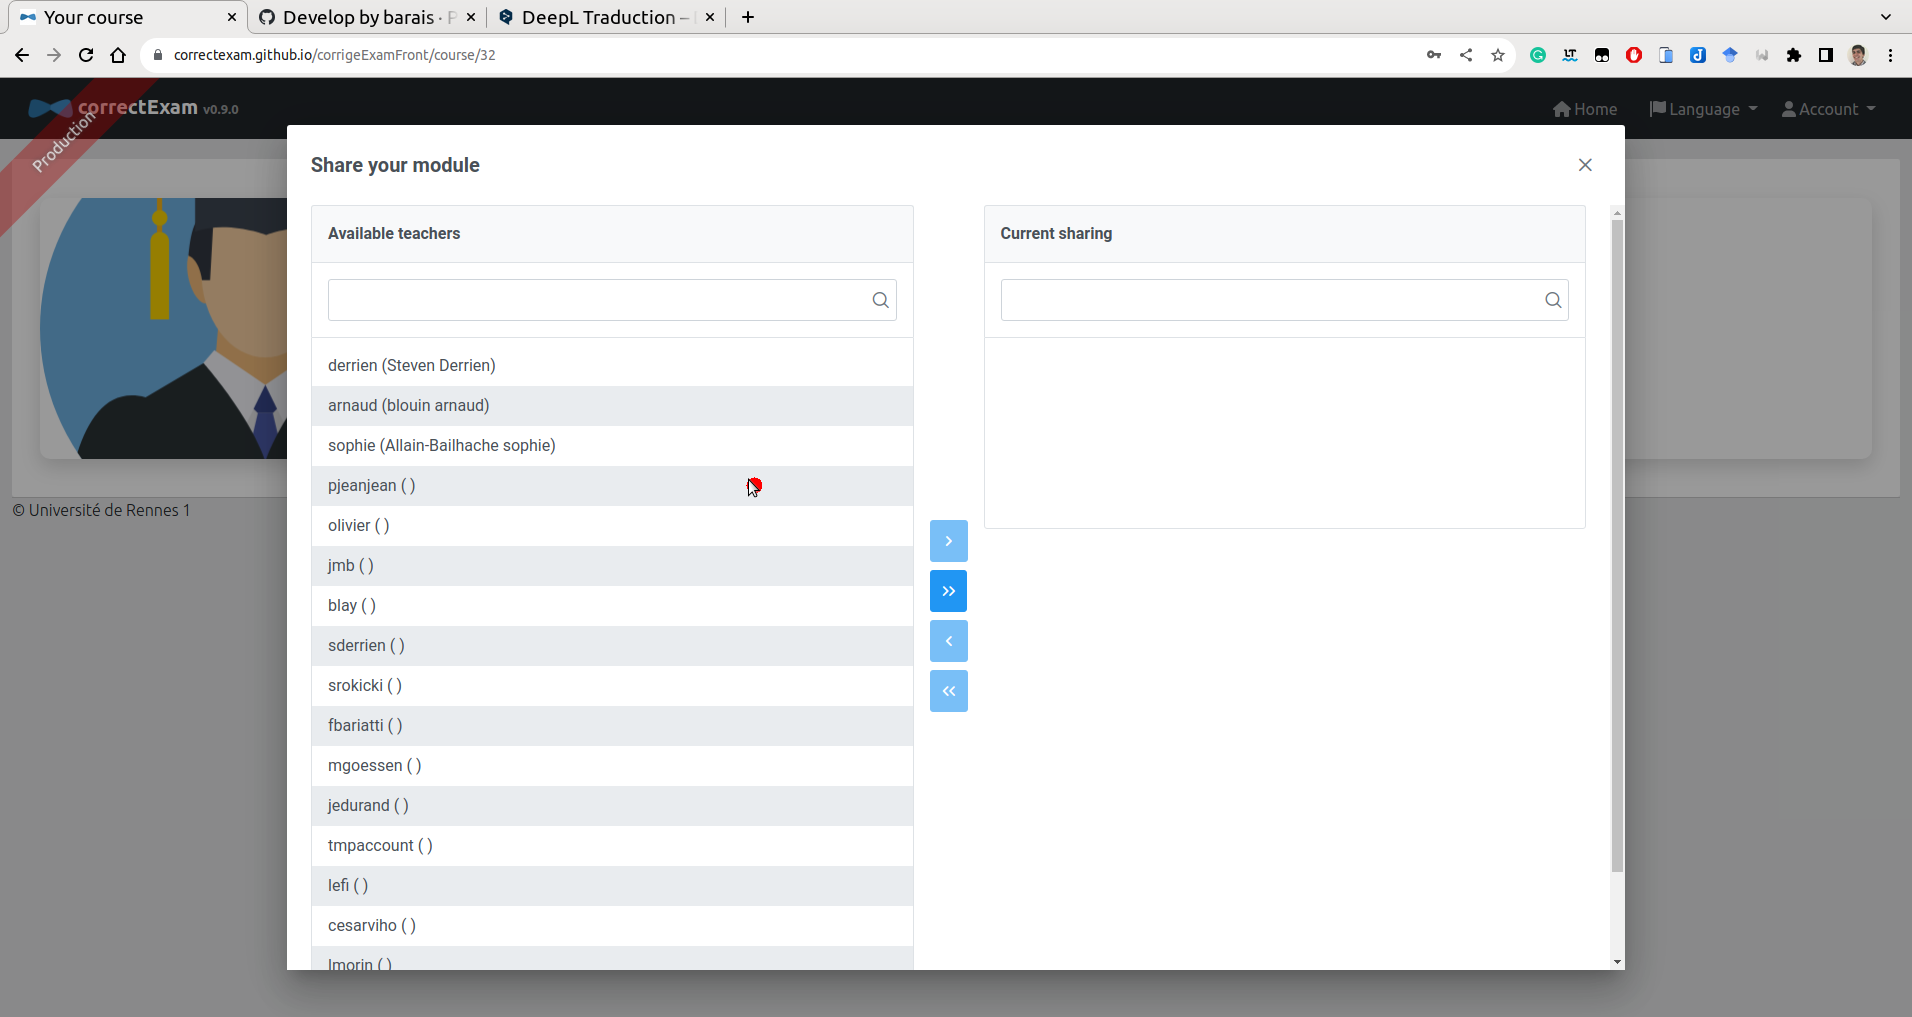
If you’d like to correct with several people, when you click on the module, you’ll have access to a shared action in the action list, enabling you to share this module with one or more colleagues. These colleagues will then see the module in their list of modules.
To create an exam, once you’ve entered the module page, you can use the (+) command to create a new exam or import an existing one. In the view that allows you to create an exam, you have access to a number of templates for creating your exam. The application’s philosophy is to allow each teacher to create his or her own exam with the tool that suits them best.
It is then necessary to load the list of students in this module. To correct, we associate each answer key with a student. This list is needed to perform the assignment task. (In the worst case, if you don’t want any names, you can always associate them with numbers entered on the copy and a list of students with names such as student1/student2, etc.).
Note
For Univ Rennes, this list is available here: https://mdw.univ-rennes1.fr/
Step 2: Create your grading scale (how each question will be graded, typical comments per question, etc.)
To create your marking scheme, once you’ve entered the page for a module, then for the exam in question, you have access to an annotate template button. This is where you define all the zones of interest, as well as the scale for each question. You need zones of interest with last name, first name and/or student number. You also need zones of interest that define the areas in which the student will answer each of the questions asked.
Understanding the different question types
For the moment, there are roughly four types of question.
Direct questions. The DIRECT notation (Manual and Direct) for which the teacher manually scores the answers to this question, assigning a mark to each student for this question.
Positive questions. POSITIVE** notation (manual and POSITIVE). This is an item for which the teacher can define a set of comments along the way that gives points to the answers to this question (starting from zero). The total number of points obtained cannot exceed the maximum number of points associated with this question.
Negative questions. The NEGATIVE notation (Manual and NEGATIVE). This is an element for which the marker can define a set of comments along the way, which removes points from the answer in question (the starting point is the maximum number of points possible for this question). The total number of points obtained cannot be less than zero.
Hybrid questions. The HYBRID notation (Manual and HYBRID). This is the correction that should eventually become the default correction, as it unifies the different correction modes. (See https://github.com/correctexam/corrigeExamFront/issues/427). The idea is to define a maximum mark for a question and a default mark. From there, it is possible to define comments that add or subtract points in absolute or relative terms (as a percentage of the maximum mark). In addition, it is possible to define from 1 to 12 brackets for each comment to apply part of the bonus or penalty. Once the final score has been computed, the application of each comment cannot exceed the maximum score for the question or fall below zero.
The QCM for which the application provides scoring assistance.
Note
Comments associated with a question can be defined here or during correction in the correction view.
How the scoring system works with different question types
For each question, you’ll need to define the question number, the total number of points and a notion of steps. The question number can be the same for several questions (if, for example, the answer zone is located on two separate pages). The number of points corresponds to the maximum score for that question. The notion of steps defines the possible increment per point.
For example, an answer to a two-point DIRECT question with a step of 4 can be marked from 0.25 to 0.25, i.e. 0; 0.25; 0.5; …; 1.75 or 2.
For example, an answer to a question of the POSITIVE type on two points with a step of 4 will make it possible to define comments that will add points worth 0; 0.25; 0.5; …; 1.75 or 2. Note that even if two positive comments result in a total score greater than 2, the score will be reduced to 2, the maximum value for the question.
For example, an answer to a NEGATIVE question on two points with a step of 4 will allow you to define comments that will remove points worth 0; -0.25; -0.5; …; -1.75 or -2. Even if two negative comments result in a total score of less than 0, the score will be reduced to 0, the minimum value for the question. If no negative comments are applied, the student receives the maximum mark for this question, i.e. in our example 2.
For example, for an answer to a question of type HYBRID the marker can define a hybrid comment “spelling” for which he/she wishes to apply a maximum penalty of 20% of the total mark for this question with 4 bands and another hybrid comment “Accuracy” for which he/she sets a mark of 100% over 5 bands and a default mark for this question of 0%. He could then give each answer a mark of 0, 20, 40, 60, 80 or 100%, plus a spelling penalty of 0%, 5%, 10%, 15% or 20%. He could also have set a single band for this ‘spelling’ comment and thus had the choice of setting only -0% or -20% of the overall mark. Once the final score has been computed, the application of each comment cannot exceed the maximum score for the question or fall below zero.
For example, for an answer to a QCM question, it will be necessary to give all valid answers. If the student’s answer is valid, he/she will receive the maximum mark for the question. If the answer is not valid, he/she will for the moment have the penalty which is defined at the time of the scale as - 1/10; - 1/8; - 1/6; …; -1/2; -1 or 0 * the maximum mark. If the student has left a blank, he will get 0 for the question. So if you set the number of points to 2, the penalty is 1/4. If the student got it right, he gets 2 points; if he got it wrong, he gets -0.5; if he didn’t answer, he gets 0.
Step 3: Load scans of correctly ordered exam papers
The next step is to load the student copies into the application. We recommend using grayscale at 150 DPI to keep the file size reasonable, but there’s no problem with a color scan at 300 DPI if necessary. Avoid pure black and white, which could interfere with the algorithm that recognizes students’ names/first names/identifiers (INE) in the next step.
Attention
The scan must arrive in ONLY ONE PDF FILE. It must be clean, i.e. no missing page(s), no page(s) in the wrong order. The application does not provide a mechanism to improve scans after import.
Use pdfarranger. This is an excellent tool for cleaning up student scans.
Tip
Staple the student copies before the students compose. Ask them not to remove the staples. Use a paper cutter to remove staples before scanning your copies.
Step 4. Straighten your scans
Now it’s time to run the image alignment process to eliminate any distortion caused by scanning the copies. If you have marks (black circles) at the four corners of the copies, use alignment with mark, otherwise without mark it will take longer. If you don’t have any MCQs and your scanner doesn’t distort the copies very much, you can also choose not to straighten the copies.
You can ask to realign only part of the copies by selecting the pages to be realigned. This allows you to see in particular the point at which it has made its alignment. This is sometimes useful to understand why the alignment is going wrong.
Step 5: Associate each copy with a student (AI-assisted)
The next step is to associate each copy with a student from the student list. It is possible to filter the students already assigned to a copy.
At the end of this stage, if you have correctly assigned all the copies, you can move on to the correction phase. If not, it’s probably because a copy has not yet been assigned.
Step 6: Correct copies (question by question or student by student or any other combination)
We now enter the correction phase. On the same or another piece of equipment (e.g. a tablet), you can correct copies (question by question or student by student). You can annotate the image with a pencil, add comments, set a grade, automatically correct MCQs, etc.
A dashboard lets you see the progress of the correction.
If you are correcting on a computer and not on a tablet, there are keyboard shortcuts for efficient navigation, or you can define your own keyboard shortcuts to apply or remove predefined comments. Press F1 to review existing keyboard shortcuts.
During this phase, it’s a good idea to tag “excellent” answers and “outstanding” wrong answers. This automatically creates an answer sheet for the students, and allows these remarkable wrong answers to be discussed anonymously with the students later on.
Step 7: View the statistics associated with passing the exam to potentially adjust the grading slightly
During or at the end of marking, you can view the statistics associated with this exam in the see results view, in order to adjust the grading, for example, by modifying the value associated with comments for POSITIVE or NEGATIVE grading. For DIRECT grading, it will not be possible to modify the grading after marking, and it will therefore be necessary to go through all the papers again if you wish to change the grading.
Step 8: Sending feedback to students
Once the correction has been completed correctly, you can use the see results view to send copies to students. Students will receive a unique link to consult their copy, and will be able to view the answers tagged excellent anonymously. The sending e-mail can be configured just before sending.
Warning
If you’ve graded your answers, they will not be graded on the online instance, but on an instance installed on your own machine. You’ll need to export the module and re-import it onto the main platform or that of your establishment for the mail sending to work correctly.
Note
This stage of transmission to students is not compulsory. It’s the tool’s primary motivation, but the tool can just be used to evaluate without seeking to give systematic feedback to students.
Frequently asked questions for users
How to create an account on the platform?
You can go to the platform, click on register, fill in some information. You will receive an email to validate your account.
You can then fill in your account information in the menu. Account -> Settings
How to create a module?
Once authenticated, on the main page, click on the + symbol create a course. It is required to give a name to a module.
Can I share a correction with one or more colleagues?
When you click on the module, you will have access in the list of actions to a shared action that allows you to share this module with one or more colleagues. These colleagues will then see this module in the list of their modules.
Can I limit the rights of a colleague so that he can only access a subset of the questions?
No, a colleague, we can trust him ;). We do not implement any specific RBAC rules per exam.
Do you have a diagram of the main steps to do to use this application?
How to create an exam?
To create an exam, once you enter the page of a module, it is possible to create a new exam with the command carousel.
Where can I find some templates for Word latex and libreoffice?
In the view that allows you to create an exam, you have access to a number of templates to create your exam. The philosophy of the application is to let each teacher create his exam with the tool he likes.
Why am I forced to upload a list of students?
To correct, we associate each answer key with a student. This list is required to do the assignment task.
Do I have to delete a student who did not compose?
No, it will be marked as ABI by default.
Can you explain the different types of questions that are available?
For the moment, there are roughly five types of questions.
MCQs for which the application provides marking assistance.
MANUSCRIPT, for which the application provides a handwriting recognition mechanism that allows the responses to be grouped according to the textual content of the response for batch evaluation.
The DIRECT scoring (Manual/Manuscript and Direct) for which the teacher manually scores the answers to this question.
POSITIVE scoring (Manual/Manuscript and POSITIVE). This remains an element for which the teacher can define a set of comments along the way that gives points to the answers for this question (we start from zero). The total number of points obtained cannot exceed the maximum number of points associated with this question.
The NEGATIVE notation (Manual/Manuscript and NEGATIVE). This is an element for which the corrector can define a set of comments along the way that removes points from the answer in question (we start from the maximum number of points possible for this question). The total number of points obtained cannot go below zero.
The HYBRID notation (Manual/Manuscript and HYBRID). This is an item for which the marker can define a set of comments along the way which subtracts points from or subtracts points from the answer in question (we start from a default number of points defined by the marker as a percentage of the maximum mark for this question, and we add or substitute points associated with comments either absolutely or relatively to the maximum mark for the question). The total number of points obtained cannot be less than zero or more than the maximum number of points for that question. The big advantage of this type of question is that it makes it easy to update the scale during marking. Eventually, this type of question should be the default.
These types of questions will be enriched in the future. Please provide your great idea.
Can I change the type of question when the correction of a question has started?
Honestly, not recommended because not tested.
Can I update my exam’s scale?
This depends largely on the type of question.
For questions of the DIRECT type. This is not recommended. If you change the scale, it is necessary to go back over all the students’ papers for this question.
For questions of type POSITIVE and NEGATIVE, you can update the scale of comments, add or remove comments. It is not recommended to update the number of points for a given question.
For questions of type QCM, you can update the number of negative points to be withdrawn without restarting the automatic correction; if you change any other type of information, it will be necessary to restart the automatic correction for this question.
For HYBRID questions, this is designed accordingly. All modifications are authorized. **.
How to clean the students’ scan if pages are missing, duplicate page, flipped page…?
Use pdfarranger or Stirling-PDF. They are great tools for this task.
Can I reload a clean scan (see previous question) and realign it if I already start to correct an exam?
Yes, no problem, if you share the correction with colleagues or with different devices, you can force the upload and download to the server later.
What happens if my template has an odd number of pages (e.g. 3 pages) and the scan of the student sheets is a multiple of 2 (e.g. 4 page per student)
For the moment, it is not managed correctly at the moment of the alignment. It will be necessary to remove the blank pages from the student scans beforehand with pdf manipulation tools like pdftk or pdfarranger or Stirling-PDF.
How do I scan students’ sheets?
We recommend using grayscale at 150 DPI to keep the file size reasonable but no problem with a color scan at 300 DPI if necessary. Avoid pure black and white which could be detrimental to the algo that recognizes names/first names/ids (INE) of students
Can I compose an exam template with another tool than word, libraoffice or latex?
Of course, the only important point is a circle marker in the corners to facilitate alignment and light gray squares to put the names, first names and ids (INE) of students.
What to do when I discover a bug in the application?
Use the github ticket system on the project https://github.com/correctexam/corrigeExamFront
Can I install the solution on my computer to avoid using the online version and correct offline (on the train, for example)?
We provide packaged releases to run on all three operating systems (windows, macos, linux) for AMD64 architecture with an integrated database.
Under linux and macos, just download the binary for your os, make it executable, launch the application and go to your browser at http://localhost:8080 (default user/user or admin/admin).
Under Windows, you’ll need to download the executable as well as the two mydb… files corresponding to the database. Place all three files in the same directory and run the executable. Go to your browser at http://localhost:8080 (default user/user or admin/admin).
Note
The project data can then be exported and imported into the online platform, for example if you want to test e-mailing students.
Can I destroy my data on the platform?
Yes, at any time. We advise you to make a backup (course by course) if you ever wish to reupload certain data. When you destroy your data, no backup is kept, so we cannot restore the data.
Which guarantees do I have that I won’t lose data in the event of a problem on the platform?
For the time being, the online platform is offered in best effort mode on a server of the University of Rennes. No data guarantee is provided. Please contact your school’s IT department if you require a higher level of guarantee.